
Orekit is free software, which means you can use the source code as you wish, without charges, in your applications, and that you can improve it and have your improvements included in the next mainstream release.
If you are interested in participating in the development effort, thank you very much! Here are the steps you will need to follow:


If your contribution consists of adding or changing a lot of code lines or class architectures, we invite you to discuss the contribution before on the Orekit forum. Indeed, a developer can be currently working on the code you want to modify. Moreover, the forum is a good place to discuss future additions to Orekit.
If you have any question during your contribution you can also visit the forum and ask them. The larger the community is, the better Orekit will be. The main rule is that everything intended to be included in Orekit core must be distributed under the Apache License Version 2.0.
Checkstyle is a development tool to help programmers write Java code that adheres to a coding standard. It automates the process of checking Java code to spare humans of this boring (but important) task. This makes it ideal for projects that want to enforce a coding standard.
Configuring checkstyle can be a difficult task when installing Orekit in an Integrated Development Environment (IDE). However, it is an important step for contributing to the library.
Here are the steps you will need to follow to configure checkstyle in Eclipse
In your Eclipse IDE, select Help –> Install New Software…
Pressing the Add… button at the top right of the install wizard will display a small popup asking for the name and location of a new software site.
Press Add to close the popup.
Select Checkstyle in the Install window and click on Next >. Proceed to the end of the wizard, accepting the licenses of the plugin and installing it.
To create the local configuration, select Properties by right-clicking in the context menu of the project explorer panel.
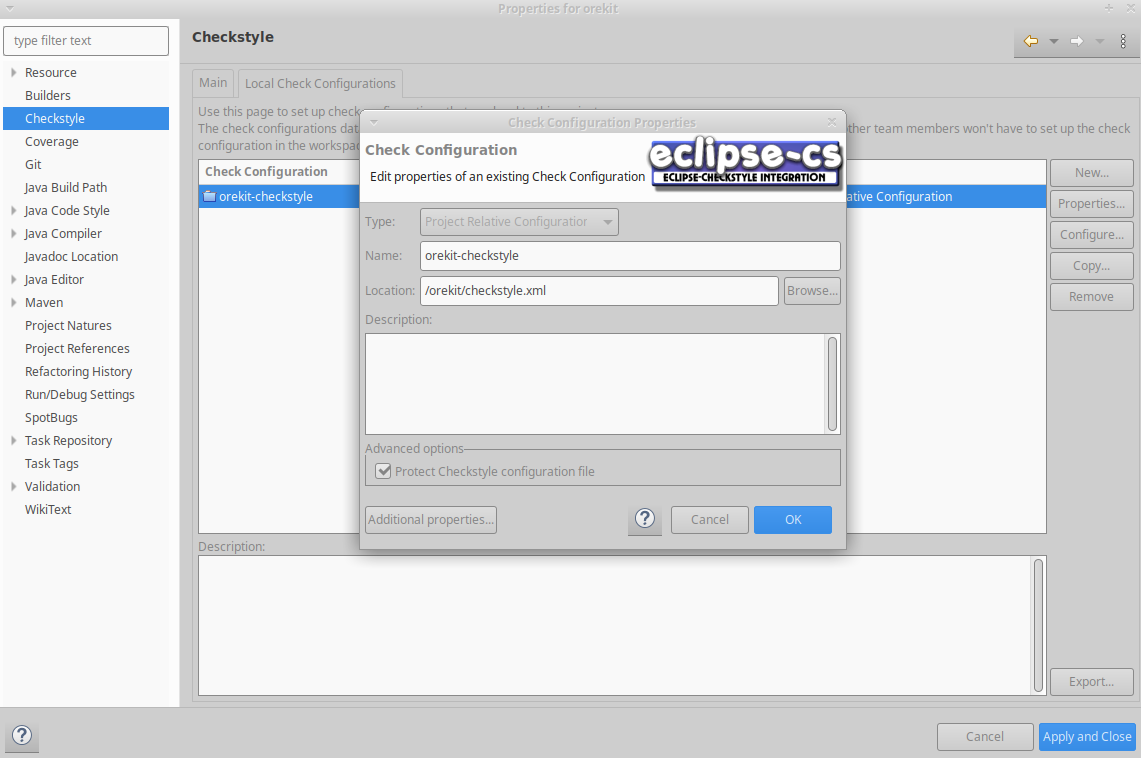
In the Properties popup, select Checkstyle entry.
In this second popup (i.e. Local Check Configurations) define a project relative configuration as presented in the figure below. We browse the workspace to select our checkstyle.xml file, and we tick the Protect Checkstyle configuration file check box to prevent the plugin to alter the configuration.
 .
.
The property must be defined by pressing the Additional properties… button, which will trigger yet another popup into which the property can be configured as shown below.
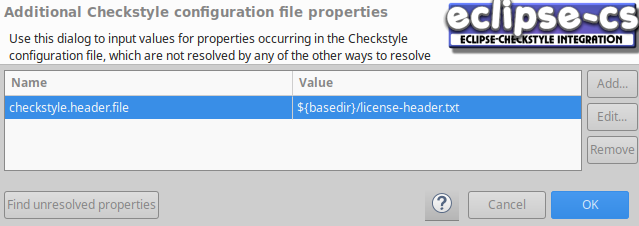
Pressing the OK button in the last open popup ends the local check configuration creation. Select the Main tab in the first popup, which should still be opened.
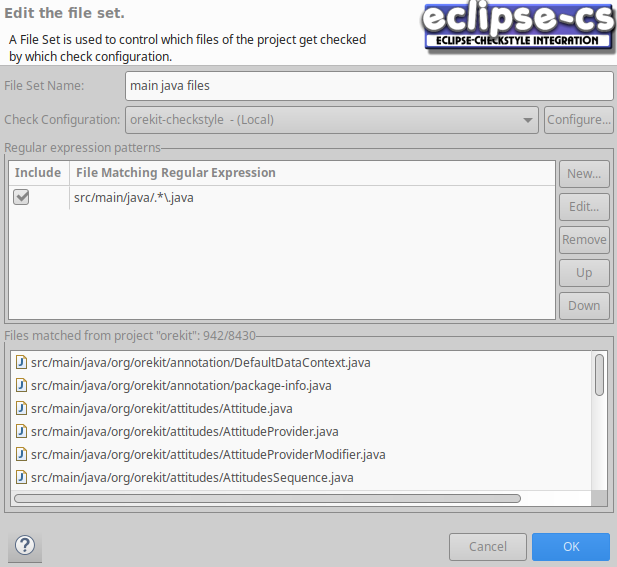
In the Main tab, un-tick the Use simple configuration checkbox at the top right. A few buttons should appear, allowing to remove the default Sun checks global configuration (selecting it and pressing the Remove button) and add our local configuration instead (pressing the Add… button). Using for example src/main/java/.*.java will apply checkstyle only to the files in the src/main/java directory and not to the files in the src/test/java directory.
Press OK and Apply and Close to finish the installation.
Select Checkstyle –> Activate Checkstyle by right-clicking in the context menu of the project explorer panel.